
Understanding Financial Planning for Disaster Preparedness
Why disaster money planning is different
Financial planning for disaster preparedness sits somewhere between classic personal finance and risk engineering. You’re not just “saving more” — you’re designing a system that keeps cash flowing, bills paid and assets protected when the normal economy of your household breaks down for weeks or months.
In regular financial planning, we optimize: investment returns, tax efficiency, retirement glide paths. In disaster planning, we prioritize continuity: liquidity, redundancy, and rapid access to relief. That shift in objective changes which tools you pick and how you size them.
What “prepared” actually looks like
In practical terms, being financially prepared means three things:
– You can pay essential expenses for a defined period with little or no income.
– You understand your disaster preparedness insurance coverage and where it leaves gaps.
– You have a clear playbook for what to do with money in the first 72 hours and the first 90 days after an event.
It doesn’t have to be perfect or complicated. But it must be written down, tested at least mentally, and known by the whole household.
—
Core Tools and Instruments
Essential financial instruments to have in place
Think of your financial preparedness kit as a set of coordinated instruments, not just “a savings account.”
A robust setup usually includes:
– Tiered cash reserves: a primary emergency fund plus a separate emergency savings plan for natural disasters (for example, evacuation, temporary housing, and deductibles).
– Insurance stack: property, renters or homeowners, auto, health, disability, life — all aligned so one event doesn’t blow up the entire system.
– Credit backstops: a low‑rate credit card or line of credit reserved strictly for emergencies, not daily spending.
Professionals often talk about “liquidity ladders”: some cash in checking, some in a high‑yield savings account, and maybe a small amount in physical cash at home for a no‑ATM scenario. Each “rung” has different accessibility, risk, and purpose.
Digital tools, calculators, and documents
To size your reserves and keep the plan operational, you’ll want a few technical helpers, not just instincts.
A simple yet powerful starting point is a family emergency fund calculator for disasters. Many financial institutions and nonprofits publish versions where you plug in:
– mandatory monthly costs (housing, utilities, food, insurance, meds)
– likely disaster duration (e.g., 1–3 months without normal income)
– location‑specific risks (hurricanes, fires, earthquakes, floods)
The calculator gives an evidence‑based target for your disaster fund instead of a guess. Store the output, together with scanned IDs, insurance policies and a list of account numbers, in encrypted cloud storage and on an encrypted USB stick.
Backup your key financial documents in at least two places and make sure the people who would act for you in a crisis know how to access them.
—
Step‑by‑Step Process for Building Your Disaster Plan
Step 1. Map your risks and your current coverage
Before moving money around, you need a risk model, even if it’s a simple one. Location, housing type, job stability and health status change both the probability and impact of different disasters.
Take these actions:
– List the top 3–5 realistic threats in your area (e.g., wildfire, hurricane, extended power outage).
– For each, ask: “What breaks financially?” Housing? Income? Transportation? Medical costs?
– Pull every policy you have and review the declarations pages to see what your disaster preparedness insurance coverage actually includes — and what it doesn’t.
This is the point where many people bring in disaster recovery financial planning services. These are specialized planners or firms that overlay hazard maps, claims data and your financial profile to quantify exposure. Even a one‑hour consultation can surface blind spots like sewer backup exclusions, under‑insured structures or missing loss‑of‑use coverage.
Step 2. Build and segment your cash reserves
Once you know the numbers, you can build an emergency savings plan for natural disasters that’s separate from — but coordinated with — your general emergency fund.
Here’s a simple expert‑driven framework:
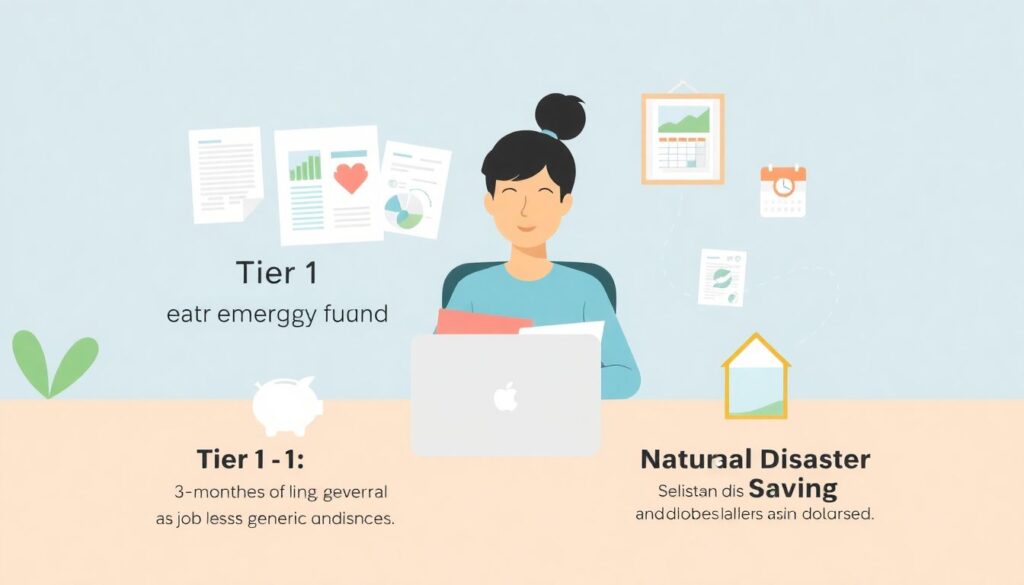
– Tier 1 – Basic emergency fund: 3–6 months of core living expenses for job loss or generic emergencies, held in an FDIC‑insured high‑yield savings account.
– Tier 2 – Disaster reserve: 1–3 months of *disaster‑specific* costs: hotel or rental, increased commuting, childcare disruptions, higher food prices, plus insurance deductibles.
– Tier 3 – Micro‑cash buffer: a small amount of physical cash in a safe, enough for fuel, food, and basic supplies if card networks go down for a few days.
Experts tend to agree on two key parameters: keep disaster funds highly liquid (no locking them in CDs you can’t break quickly), and label them clearly. A separate sub‑account named “Disaster Fund” is a behavioral nudge that makes you less likely to raid it for non‑emergencies.
Step 3. Protect income streams and critical assets
Cash is only part of the equation. Long interruptions to income can be even more damaging than the immediate cost of repairs.
Professionals usually suggest a layered defense:
– Income protection: disability insurance and, if appropriate, business interruption coverage for self‑employed people.
– Asset protection: ensuring property limits are high enough to rebuild at current construction costs, not what you paid years ago.
– Health and life coverage: catastrophic health coverage and adequate life insurance so dependents don’t face both emotional and financial devastation.
A small technical tweak with big impact: align your policy deductibles with your disaster fund. If your homeowners and auto policies each carry a high deductible, your disaster reserve should explicitly cover those amounts so a single event doesn’t eat your entire cash cushion.
—
Working With Professionals
Finding and evaluating the right advisors
You don’t have to do all this alone. The best financial advisors for disaster planning combine standard financial planning credentials (like CFP or CFA) with experience in claims, risk management or regional hazards.
When interviewing advisors, ask targeted questions:
– How do you integrate local hazard data into client plans?
– What did you change for clients after recent disasters in this region?
– How do you coordinate with insurance agents and estate attorneys?
You’re looking for specificity, not vague reassurance. An advisor should be able to describe concrete strategies they’ve used — for example, helping coastal clients stage evacuation cash, or adjusting coverage for wildfire‑prone properties.
What professional disaster planning engagements include
A solid engagement with disaster‑aware planners or disaster recovery financial planning services often includes:
– A risk and vulnerability assessment tailored to your address and job sector.
– A written emergency liquidity plan spelling out which accounts to tap, in what order.
– An insurance optimization review to close coverage gaps cost‑effectively.
Good practitioners will also run scenarios: “If your income drops to 40% for six months, here’s how the plan holds up; here’s where it breaks.” This scenario analysis makes the abstract feel real and helps you decide where to allocate limited dollars.
—
Troubleshooting Common Problems
When your plan doesn’t seem to work on paper
Sometimes people do the math and discover the recommended reserve is much larger than they can reasonably build in the near term. That’s a valid outcome, not a failure.
If the numbers don’t fit:
– Prioritize by probability and impact: fully fund for the most likely, high‑impact events first (for example, a 2‑week power outage) before planning for once‑in‑a‑century scenarios.
– Use partial funding plus structural changes: maybe you can’t save for six months of costs now, but you can add loss‑of‑use coverage and lower deductibles, reducing the cash you need.
– Time‑phase your targets: experts often suggest setting 90‑day, 1‑year and 3‑year targets instead of trying to “be fully prepared” immediately.
If cash flow is tight, advisors may recommend automated micro‑savings (for example, $25 per paycheck) into the disaster sub‑account so the fund grows without constant decision fatigue.
After a disaster: executing and adjusting
When a disaster actually hits, the plan becomes an operations manual. But reality always diverges from models, and this is where troubleshooting in real time matters.
In the first days, focus on:
– Safety and documentation: secure your family, then start documenting damage and expenses with photos and receipts.
– Triage spending: follow your pre‑defined priority list — housing, food, medical, communications — and avoid committing to long‑term contracts while things are unstable.
– Claims and aid sequencing: file insurance claims early, then layer in government aid and charitable support where eligible.
Post‑event, schedule a structured debrief with yourself, your household, and any advisor you work with. Evaluate how the financial components performed: Were your reserves enough? Was access to funds smooth? Did your disaster preparedness insurance coverage respond the way you expected?
Use those real‑world observations to iterate: adjust coverage, increase or reallocate savings, update contact lists, and refine written instructions. A disaster plan is a living system, not a one‑time document.
—
Final Expert Takeaways
– Treat disaster readiness as a dedicated component of your financial plan, not an afterthought.
– Segment your reserves and match them to specific risks, deductibles and time horizons.
– Use tools like a family emergency fund calculator for disasters and professional guidance where the stakes are high or the risks are complex.
The goal isn’t invincibility; it’s resilience. With a clear structure, the right instruments and periodic tuning, your finances can absorb shocks far better than most people realize — and that calm, in the middle of chaos, is the true return on disaster‑focused financial planning.